
We eat first with our eyes, so apparently said Apicius, the presumed gourmand and cookery writer who lived during the Roman Empire. It's been many centuries since and yet the same principle remains. We live in a visual age and strong food photography helps you stand out online.
While managing the many elements of a business, a menu photography project is often low on the list of priorities. There's no hard deadline, and it requires time and budget. Maybe you've been doing pretty okay without it, or you’ve even been burned from a previous experience with a photographer.
Whatever the reason, it's understandable that nailing food photography gets put on the long finger, but there is a lot to gain from optimising your menu with strong visuals. In fact, Flipdish data shows that stores that have images on their menu have revenue that is on average 29% higher than those that don't. Here are three ways to get started.
Looking to improve sales through smarter menus in 2025?
Download our latest report Mastering Restaurant Menu Psychology with AI and unlock powerful strategies to influence customer choices and increase revenue!

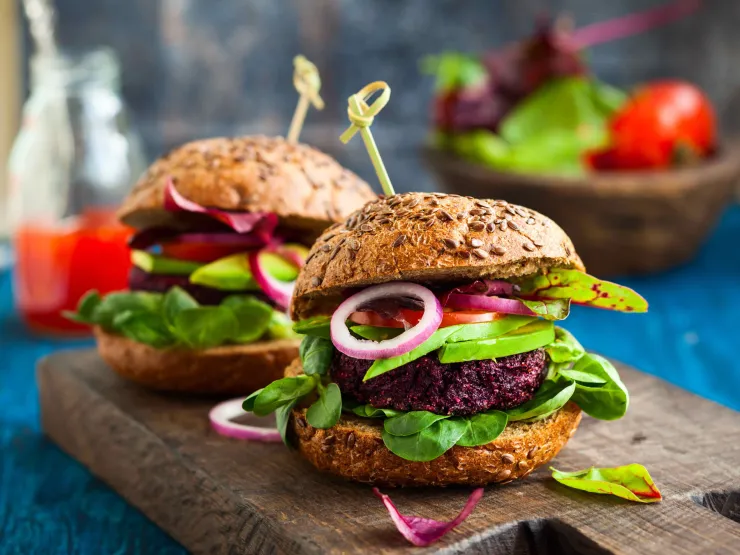
1. Try out stock imagery at first
In an ideal world, all businesses would have their own unique styled imagery, however, this isn’t always possible, so stock photography is often substituted in. The suitability of stock photography depends on the cuisine type you offer and the uniqueness of your dishes.
For example, if you own a pizza restaurant and serve classics like Margherita, pepperoni and Hawaiian pies, chances are you’ll be able to find images of pizzas with those toppings. However, if your pizza restaurant is famous for unique combinations and local ingredients, this may not be a runner for you. Similarly, say you run a burger joint where your homemade sesame buns are your speciality, but all the stock photography images are brioche buns, then stock imagery won’t work for you.
Stock photography can be low-cost and straightforward. Make a list of your menu items and spend some time searching on free trial stock photography websites for the corresponding imagery.
The Flipdish menu team also has stock photography on hand so you can check in with [email protected] as well.
2. Take your own photographs
If you or one of your team members has a good eye, or your menu changes quite regularly, it may be worth DYIng, upskilling or even investing in a professional camera. However, many cameras on phones are really exceptional, so don't rush out and buy something before you try your phone first — a 12-megapixel camera phone and a table by a window can work wonders for an online menu. For menus, we recommend taking the photograph in landscape mode and at a 45-degree angle.
Check out this short tutorial, a teaser from the Flipdish Academy's free 'How to create the perfect online menu' course, for more tips.

Photographing your own menu takes time and can be daunting. Try tackling it in pockets. Start with some menu engineering, identifying Stars and Puzzles, and photograph these menu items first. If the light is low, a pop-up lightbox is a small investment that can help you illuminate your menu items better, but in most instances, daylight and a window are all you need.
3. Brief a professional
Ask your network for a recommendation or research online to find a professional food photographer in your locality. Remember, some cuisine types are more photogenic than others, so you may need a food stylist too. In some cases, a food photographer may be a stylist too, or they will have someone they prefer to work with so do ask when you’re asking for a quote. Like any job, it’s good to get three quotes before making a decision.
There are many articles on how to brief a food photographer online, and it's worth spending some time with these and finessing your brief so you get exactly what you ask for. A detailed brief also helps the photographer quote more accurately. The food photographer you hire will need to know:
- The background of your business
- Your objectives, goals and values
- Who your target audience is
- Who the food stylist is
- What dishes or menu items you want to be photographed
- When your kitchen or restaurant is available to host a photographer and what the light is like there
- Who will attend the shoot on the day
- By what date you want the images for
- How many rounds of edits to quote for
- What file sizes and formats you want your photographs in
- Where these images will be used
- Basic logistics: address, shoot date and times, parking information, COVID-19 precautions
It is helpful to assemble some imagery of styles that you like and share these with the photographer in advance of the day — Pinterest makes this very easy. Remember, one size doesn’t fit all. If your references don’t suit their style, they may recommend an alternative photographer for you, so give this process a good lead time.

Conclusion
109 seconds is all you have to make a good first impression. That’s the approximate amount of time diners spend scanning through a menu. It’s far easier to click away from an online menu than it is to get up and walk out of a restaurant, so spend some time optimising yours with strong imagery to increase the probability of customers placing a higher-value order. Ready to get started? Put identifying your most profitable menu items on your To-Do list this week.
Need help from Flipdish getting your photos added to your menu? Check out this short tutorial on How to upload menu images or contact [email protected] and we’ll be happy to assist.
Once you’re happy with the imagery on your menu, check out some ways to add animation on your menu to highlight specific items with GIFs.
